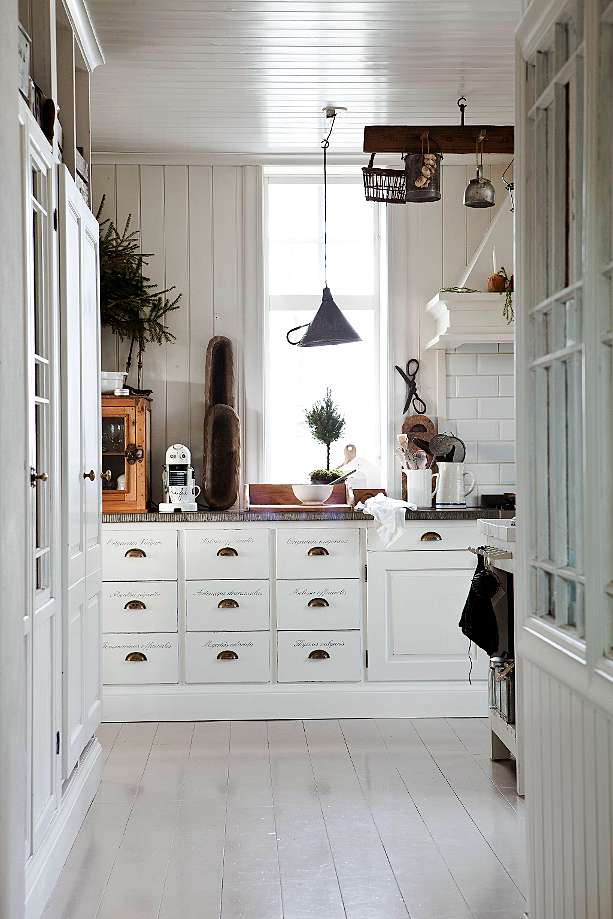
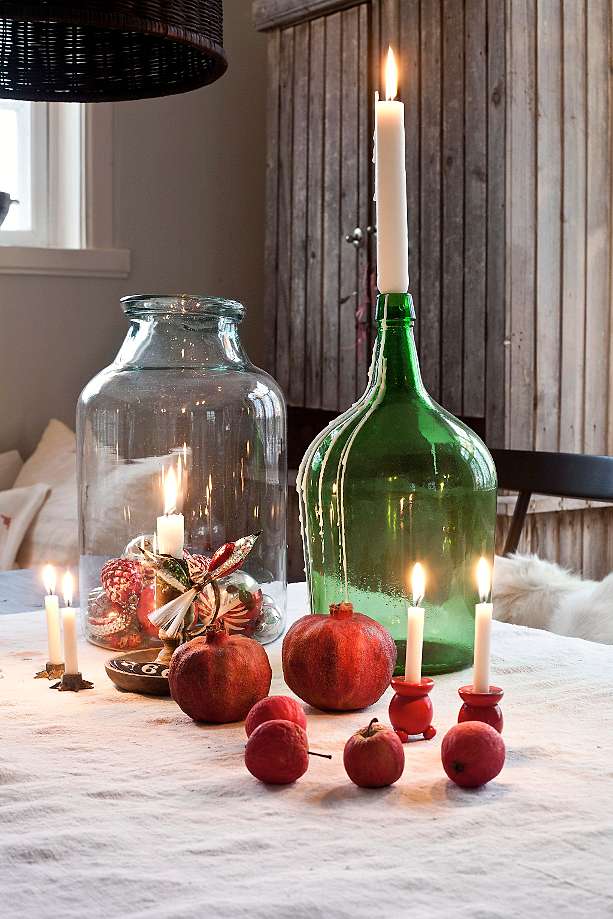
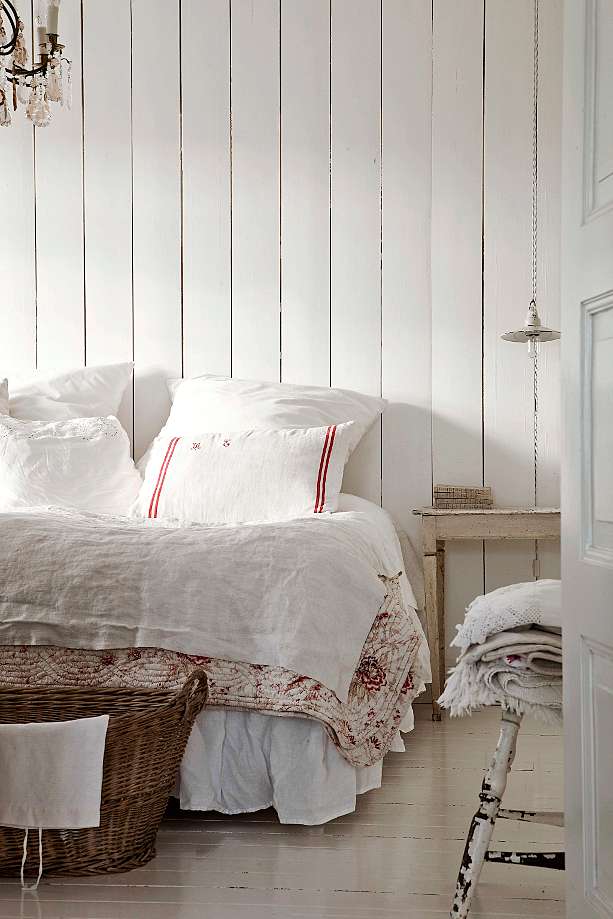
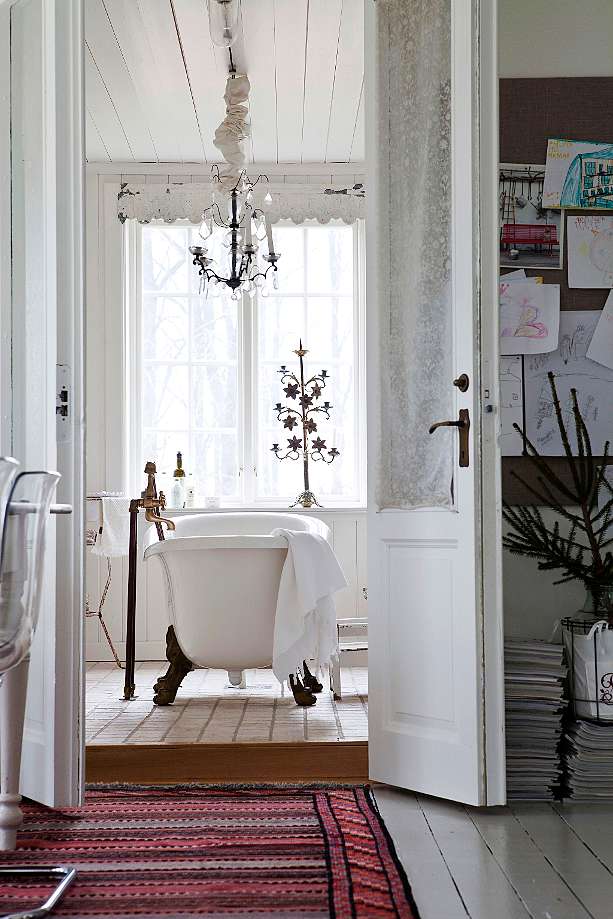
Entramos ya en Noviembre y hoy os quiero enseñar una casa con un ambiente tipicamente nórdico
¿No os parece perfecta para el tiempo que entramos?


♡ ♡ ♡
Gracias por tu visita ¡ Vicky
Hello all and happy Halloween! We’re expecting heavy storms tonight so Halloween has been moved to tomorrow night throughout much of Indiana. Have you ever heard of such a thing – Halloween moved? I’m glad they’ll still get to trick or treat but it better rain like heck tonight. ;)
I don’t know what it was this year but I haven’t pulled out as much of the Halloween stuff. I had some fun crafts in mind but just plain ran out of time to do them. Next year I’m going to plan better and start earlier. (Says the girl who says that every. year.)
We’ve had the outside decked out for weeks and a few things inside, but last night the Bub was feeling better so I pulled the bins in and I let him put stuff wherever he wanted. He had a BLAST and could care less that it will only be up for a couple more days.
I thought I would share some of my projects from the past so you too can plan ahead of time for next year if you’d like to try them out. If you have time and all. ;)
I use a LOT of paper for Halloween decor. The BOO letters are just cheapy wood from the craft store covered with Halloween paper:

I used my vinyl cutting machine to cut out a ton of black bats (out of black paper) and I reuse them every year:

I also cut out spiders and webs and I put those on the inside of the lamp shades:

You can only see them when you turn on the light. So cute!
And yes…I put the mice on the stairs again this year, even after the mouse debacle:
 It’s part of my healing process. ;)
The bonus to all the paper is that it’s super easy to store year to year!
Last year I tried a new idea and it turned out well at first:

You’ll have to see the how-to to see how it turned out. It was SO cute though.
A few years back I made mummy votives:

Again, a super easy and cheap project!
I used the computer and printer (and some spray paint for the frames) to make some Halloween art a few years back:

And I free-handed a ghost shape on contact paper and put it on a mirror:

I still use him every year! :)
And here’s how the Bub decorated this year – I found Stan the Skeleton in my office:

Stan scared me to death when I walked in here this morning, not even kidding.
He decorated the TV dresser quite well, I must say:

I especially loved the little touches like a skeleton head perched on top of the spider:

We have a lot of stuff hanging on door knobs:

He made sure to position this guy with his hand up:

Still not sure why but he’s wavin’ it around like he just don’t care.
He ran out of door knobs so moved on to other areas to hang stuff:

And the mantel is positively spooky:

He did good, right? Sometimes I lose sight of the fact that he could care less how it all looks – it doesn’t need to be in a perfect vignette to make him happy. He had SO much fun running around decorating last night. I think we’ll do this every year. :)
Hope you have a wonderful, SAFE Halloween! We’ll be carving our pumpkins tonight since we won’t be trick or treating till tomorrow. Happy Halloween!


 |
| Elin Kicken, Vastenhem via Husligheter and Stil Inspiration with thanks. |
Hey all! I’ve got a sick boy at home today so I’m keeping it short and sweet today! :)
If you’re local and are looking for some FUN shopping and unique finds, a fantastic event is happening this weekend and I can promise you’ll find both there!
The Indie Vintage Marketplace is having their first indoor event of the season this weekend and if you’re local (central Indiana) you won’t want to miss it! I blogged about my first trip here and another trip here – it was a blast both times and I have no doubt this weekend will be a great one too.
Here’s a few of the items that I loved and some that I purchased earlier this year:

I don’t think I ever shared our big metal star:

I set it up in the basement and it is SO cool! :) One of my favorite finds ever.
This weekend it runs on Friday evening from 5 to 8 p.m. and then Saturday from 8 to noon. The folks at Vintage Marketplace are offering a few of my readers free tickets to the event! I have eight free tickets to give away so if you’re local (this will be held at the Fountains in Carmel, IN) comment here with your email and I’ll randomly pick winners tomorrow.
**Edited to add: They’ve offered even more tickets so we have 20 to give away, WHOOT! I’ll pick winners and email you by 5 p.m. EST on the 31st.
And if you’ll be there look for me Friday! I’ll only be able to stay for a bit but I can’t wait to check it out. I may have to go back again on Saturday. ;)


Hey hey all! Well thank you for the kind words yesterday! :) We are very excited.
I’m back with a DIY project I’ve been wanting to tackle for a long time. I mentioned a while back that my house had been finally been debrassified, but I was wrong. I had forgotten about a couple knobs in the house. Drats.
But these were exterior door knobs that we use a key with – so replacing them meant two things: lots of $$ and since they are keyed don’t you have to make new keys when you install them? I always thought you did but maybe not. But still, lots of moola to replace two of them.
I didn’t feel like spending lots of moola so I figured I’d try out a DIY to change them up. I’ve always wondered how spray painted knobs hold up and it’s the age old question – some say they do great, some say they do horribly.
We’re about to find out. Well…in a few weeks/months anyway.
I did a couple doors with varying uses/elements so it will be interesting to see how they turn out. But first, the how to.
You take the offensive shiny thing off:
Ignore the horrible, dirty mud room door. And missing trim. And blinding brass.
Don’t be afraid to take the knob off – even I avoided this for years and it’s not a big deal. It's two pieces and the screws, that’s it. Just remember how they go back together and always remember the access to the screws side goes inside the room!
First up, and I think this is most important part – clean them. I just used my basic cleaning stuff but anything that will get any grime or grease off is what you want:
Thing is, if you don’t clean them well the primer and paint won’t hold well – you’ll get crackles (the dreaded crackle, shakes fist in air!!!!) or it will easily wear off those dirty areas.
I took them out in the garage and needed something that would allow them to stand up, so I stuck the one with the long part into a shop towel cardboard box and just laid the other one on top:
I later stuck the screws in there too – they stand up straight so you can spray all sides at once.
So…the primer part. Well. I have some really good (and expensive stuff) called BIN primer in a spray. But it’s a pain in the butt. I told you more about it here. I’ve tried everything to make it spray smoother but it just doesn’t work. This time my gloves and the can ended up covered in the primer:

SO frustrating. The paint sprayed all clumpy and gross too, so I actually had to sand down the knobs a bit to help that. I’m throwing the primer out, which is annoying cause it’s not cheap.
Anyway…I ended up just using a basic black primer instead:
The BIN stuff is stronger, better primer, but I was tired of cussing so there you go.
Don’t they already look so much better though? SO. much. better.
I finished up with my BFF…good old ORB (that’s oil rubbed bronze for those not tight with it):
Hello my friend. Good to see you again.
When spray painting remember short, light coats – not long, heavy ones. There’s really not much to it if you remember that.
I took the knob off the back door too and you can see the wear on the keyed side from being outside:
So it will be interesting to see how these hold up – the mud room door is one we use a key on all the time, so that will get lots of wear and tear. The back door we don’t use a key on much, but the outside part gets hit with the elements. And we use both doors numerous times a day.
On the back door I took the knob off and did that first:
I didn’t want to take both off just in case something went wrong. You know I don’t have much luck with that door.
The deadbolt part was a little more tricky – we’ve been told we need to replace our whole back door (water issues) and every time I get inside there I see why. The insides of that one were rusted so it was hard to get the lock part off the outside part of the door. I just ended up spray painting the inside part.
I also took the strike plate off and sprayed that, but I know it will get scratched up – it already is. Most of it should stay the ORB color though, so we’ll see how that holds up:

I decided to makeover that mud room door so I can’t show you the after on that one just yet. ;) But here’s how it looks on the back door:
So here’s the thing about painting doors – this is why you really want to take the knob off before you paint. I didn’t and now the knob isn’t exactly where it used to be and you can tell. :)
I can’t wait to show you how it looks on the mud room door! LOVE how the room is coming together! There’s a long way to go but I think it’s going to be fun.
I’ll update you in a month or two and let you know how these are holding up! I’m really interested to see. Our coach lights that I spray painted still look fantastic:
They are exposed to the elements for sure, but no one handles them.
Have you ever tried spray painting door knobs? How did it turn out for you? I’d love to hear! I love a good experiment. :)
Update: To see how these turned out go here.


